Azure Load Testing Series - Create and run a load test

About this blog
Hey folks!, We have already seen a brief about a high level overview of azure load testing in the first blog of this series. In this blog we will see how to create and run a load test in Azure.
Create Load test resource
Creating resource
-
In your azure portal select + create a resource and search for Azure Load Testing ( It is still in preview stage when this blog was created )
-
Click on create and provide the required information to configure Azure load testing resource as below

- After providing those information , select Review + create , Once it is validated you will be able to select create to start the deployment of the Azure Load testing resource
Assigning permissions
- Once you are into the resource , select IAM option and then select add role assignment
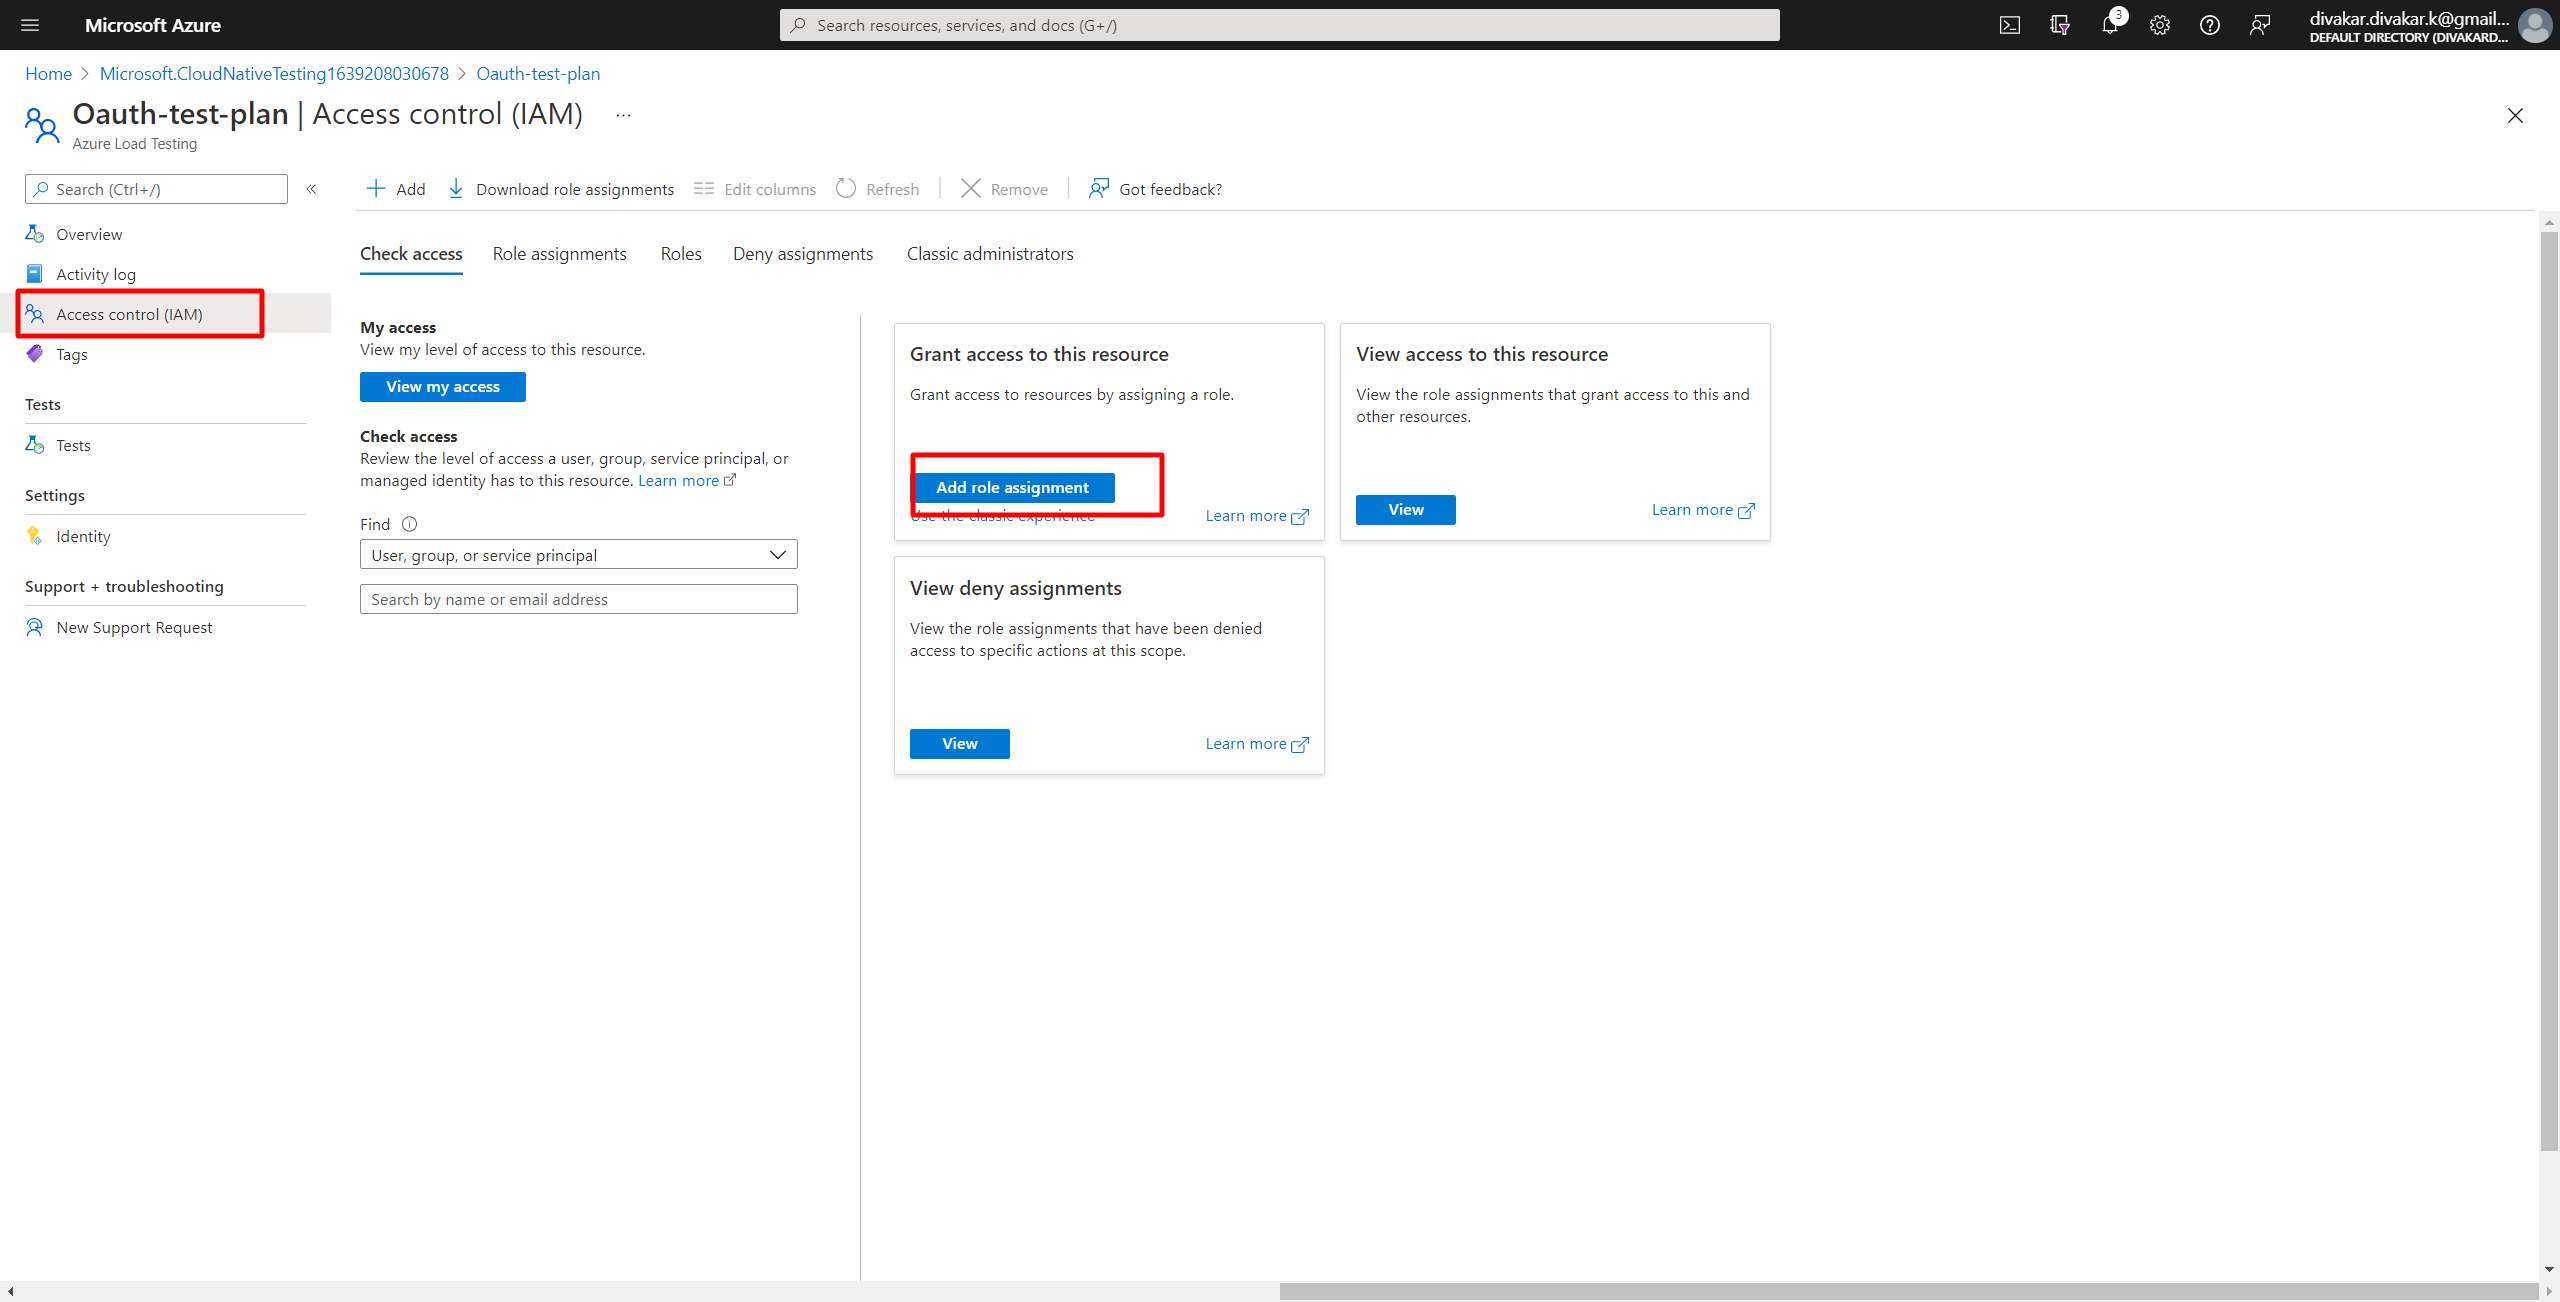
- Assign either Load Test Contributor or Load Test Owner role to your account.

- In the next tab select the members to whom this permission is to be applied and proceed to Review+assign tab

Create test plan
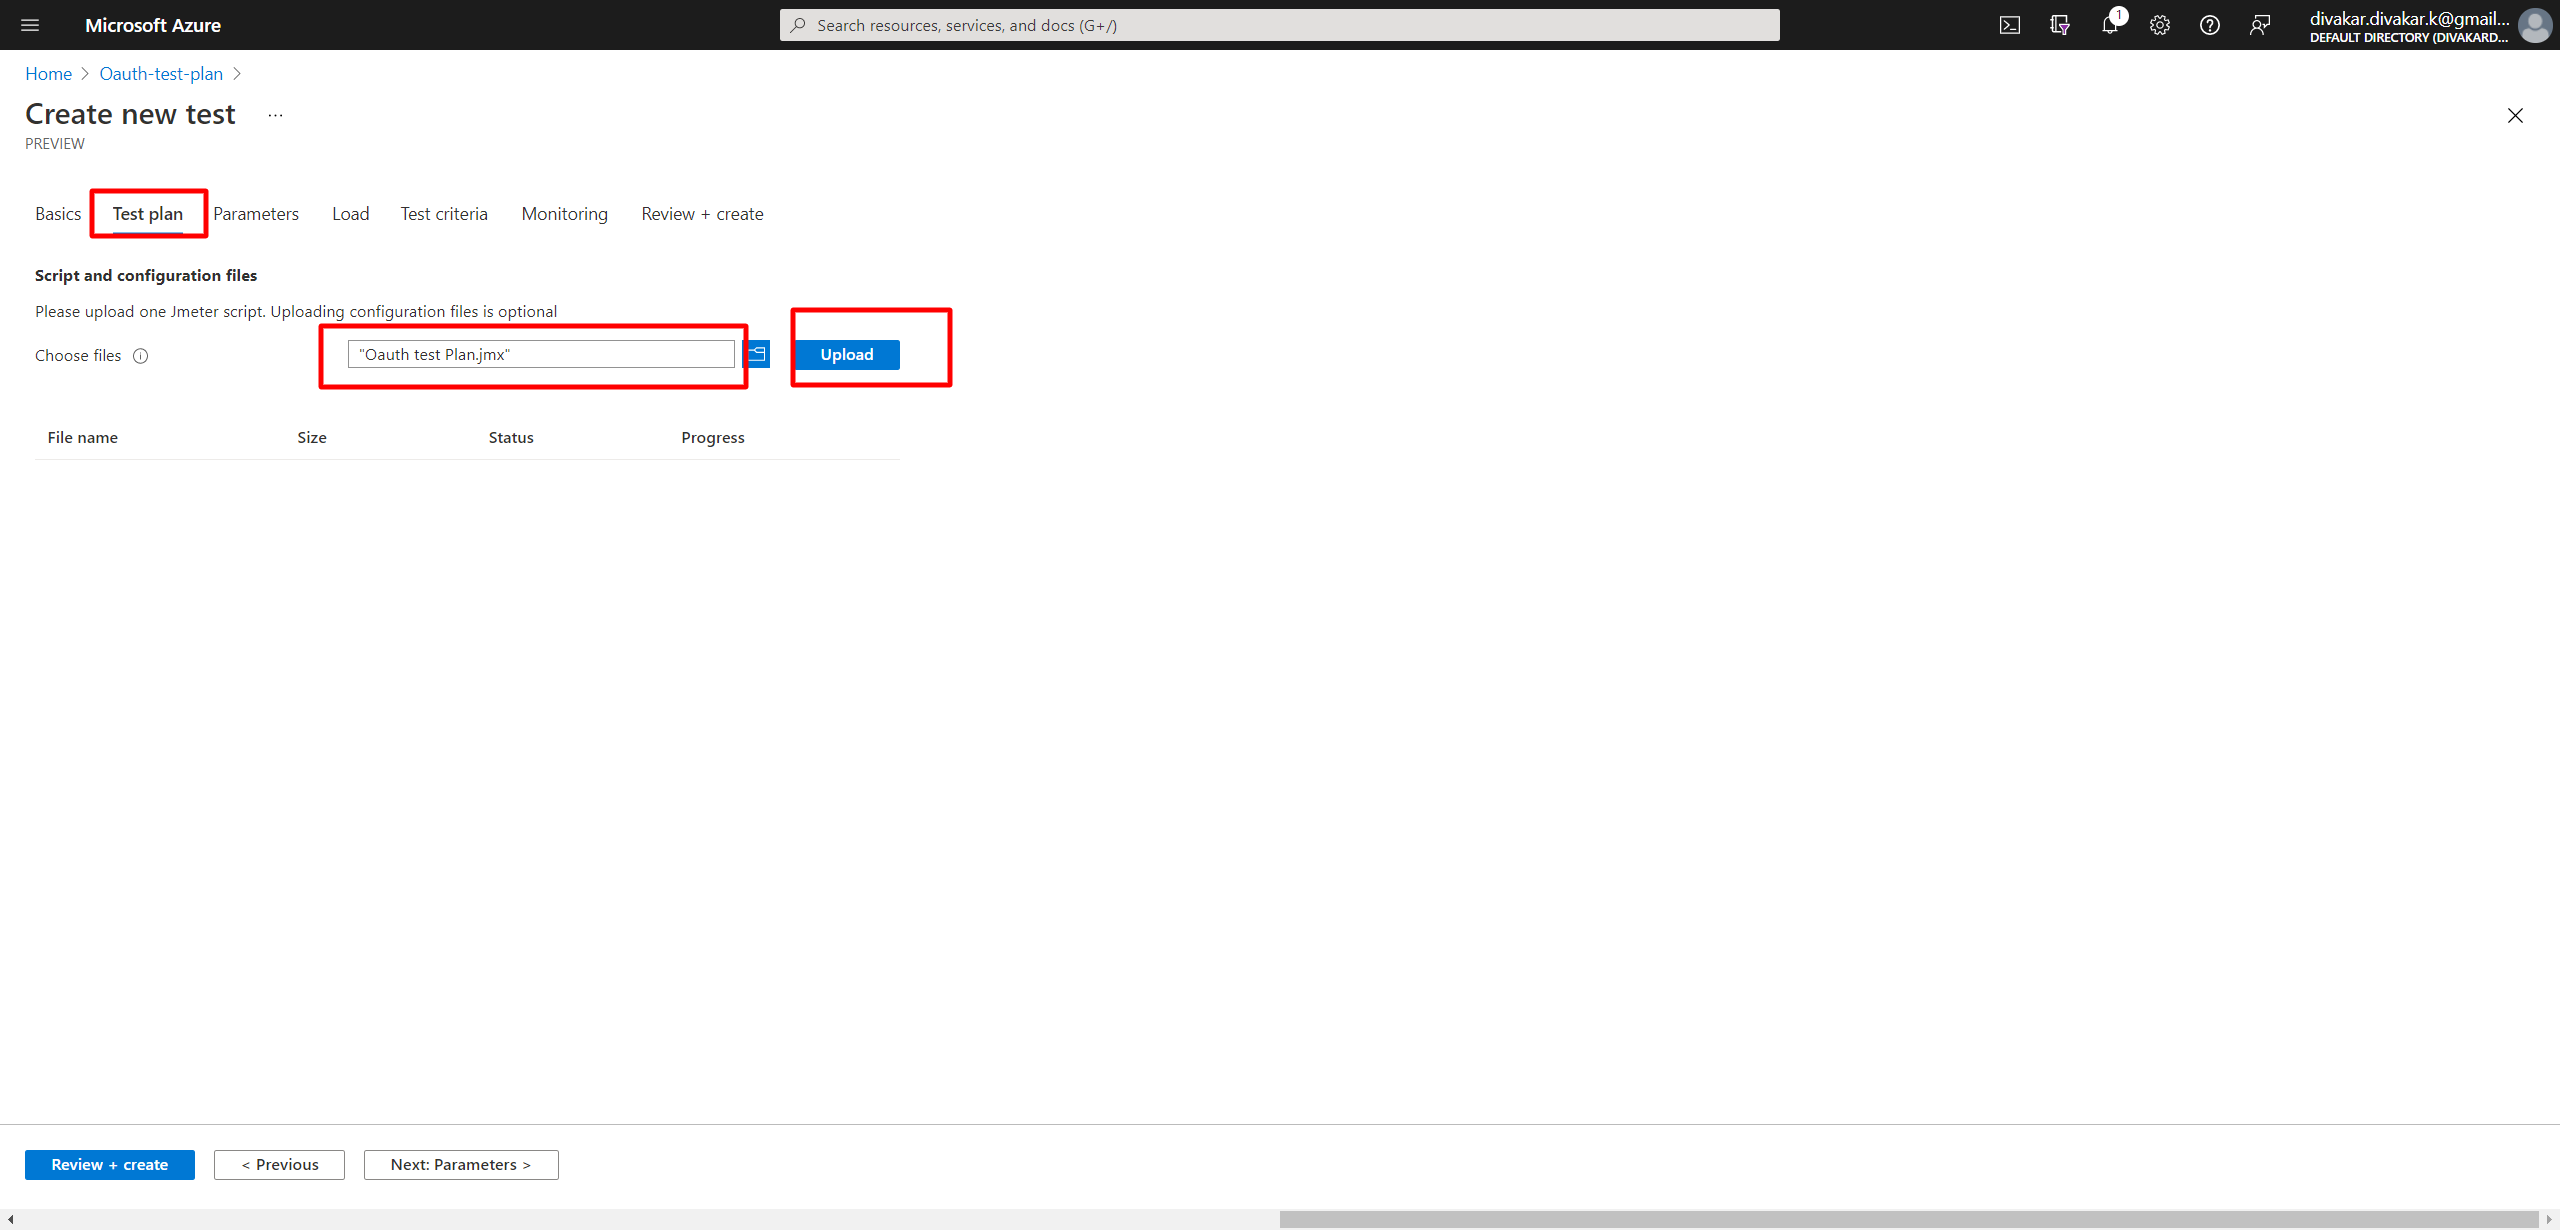
- Once the role is assigned , you will be now able to create a test plan

- Provide a Test name and move to next tab Test Plan , In this tab select your JMeter script that we already created as part of previous blog and then select Upload to upload the file to azure.
- We can skip to last option and click on create, as we will be covering in detail about monitoring and parameters in a separate blog :)
Test Run execution
- As soon as we created the test plan it will start to run by default ( we can modify it while we creating the test plan if we don’t need to run it after the test plan creation)
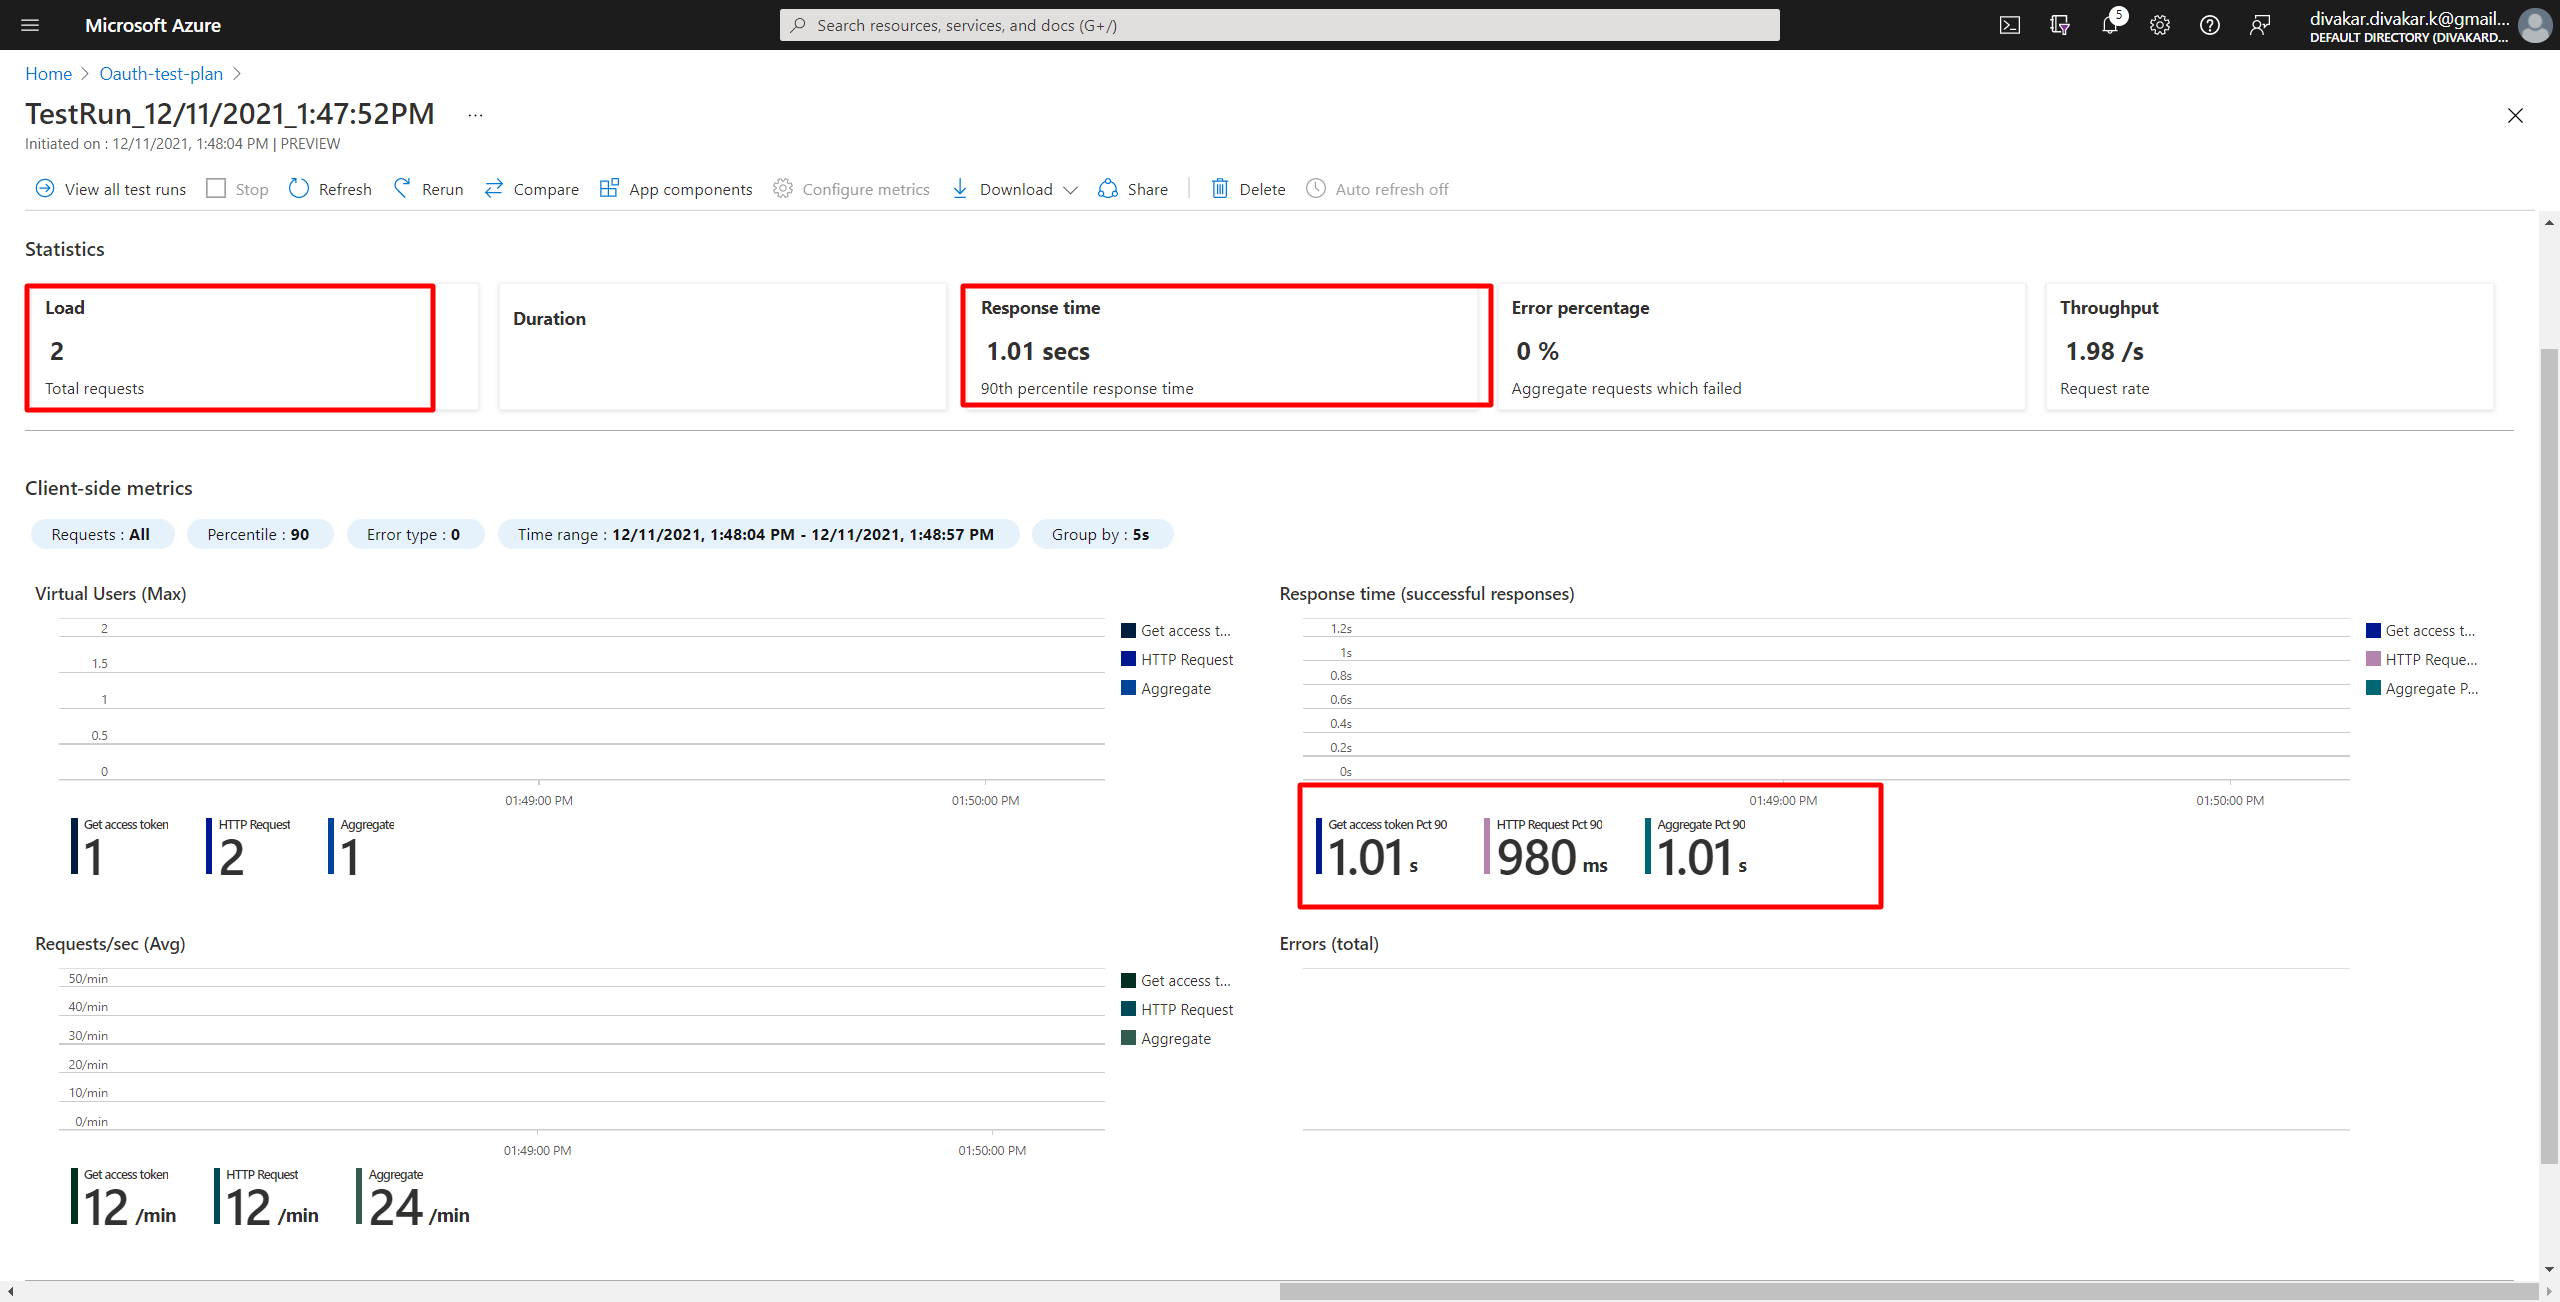
You can see the clien-side metrics while the test is running. By default the data refreshes every five seconds
- Let’s modify our JMeter script to have 100 concurrent users and see how our application performs for high scale loads
- We could see there is a increase in response time and performance of our application.
Compare test plans
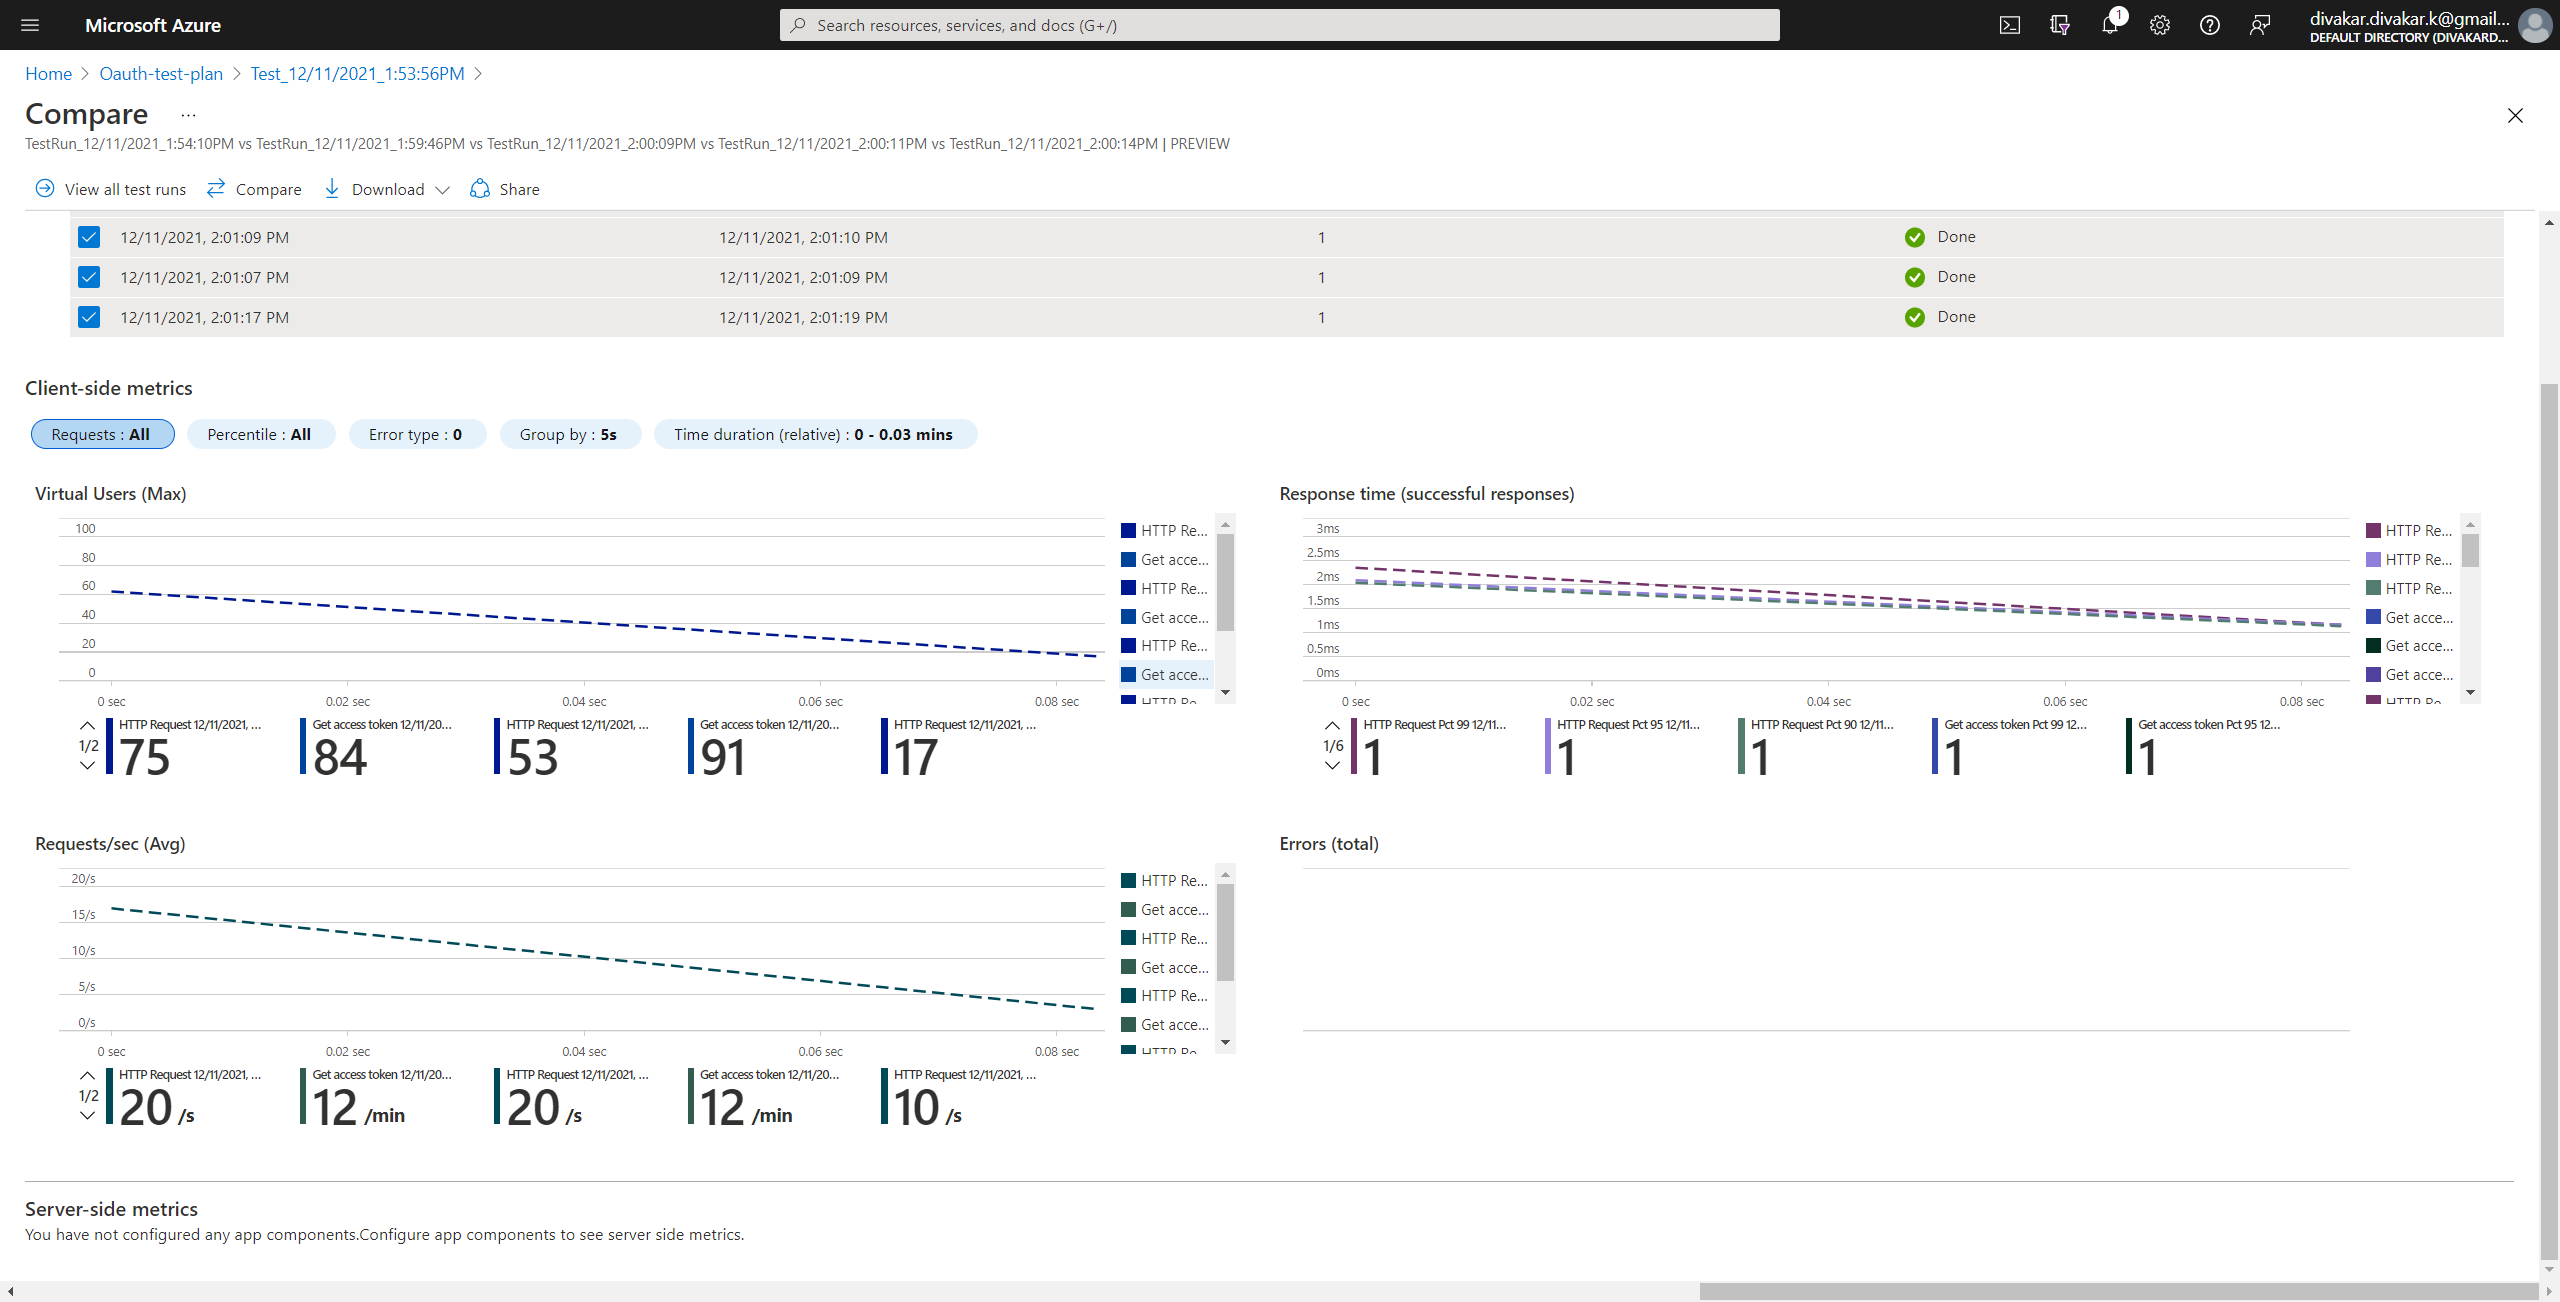
- We also have an option to compare between test plans , to do so I reran our previous tests for multiple times and in the Test blade you need to select test plans that you want to compare and click on compare

Next steps
In our next blog we will see how to create Continuous regression testing (CI/CD) using Azure pipelines
Join us
Please go ahead and join our discord channel (https://discord.gg/8Cs82yNS) to give some valuable feedbacks

Sponsor
If you find this post helpful, please consider sponsoring.
