Create .NET Core Project Template

In this blog let’s see how to create custom template that will hep us to speed up our development process and also helps us in maintaining each solution at ease.
Why we need custom templates?
Consider we are developing a microservice application , as a team we should follow the below standards across all services.
- Folder structure
- Clean Architecture
- OpenAPI specifications
- Resiliency
- Authentication
- Authorization
- Health Check
Tracking and maintaining these standards across all services are painful and one should invest considerable amount of time in creating these standards across each services. In order to avoid this wasted effort across all services , .NET SDK provides you the capability to create your own custom templates.
If you wanted to share this template across all developers , one way to do it is Nugetize the custom template project and install it from a NuGet package on any NuGet feed, by referencing a NuGet .nupkg file directly, or by specifying a file system directory that contains the template. I have covered this part in my next blog , check this out if you want to know on how to nugetize the package and upload it to nuget.org.
.NET CLI overview
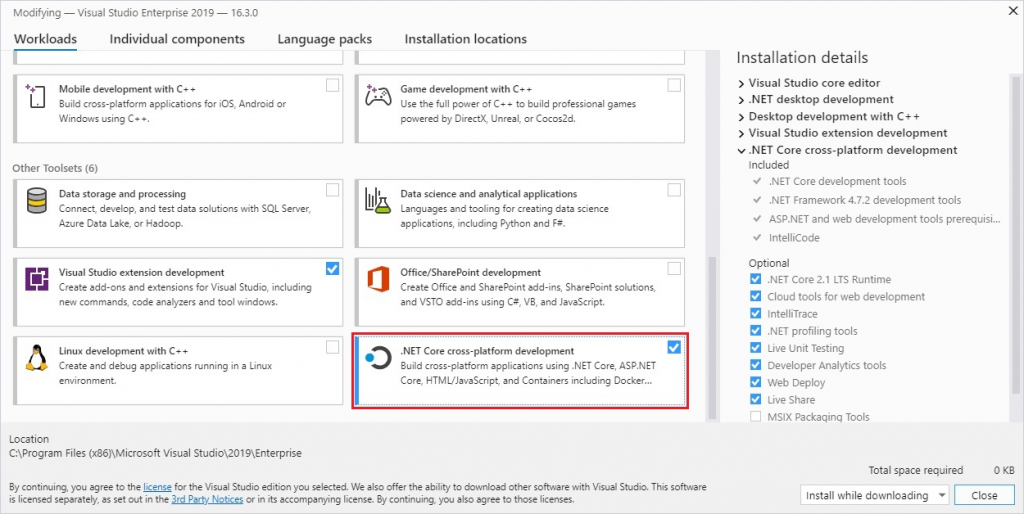
.NET command-line interface is a cross-platform toolchain for developing, building, running, and publishing .NET applications. This comes along with your .NET SDK and you can also install this tool as a workload alongside with Visual Studio on selecting .NET core platform development tools.
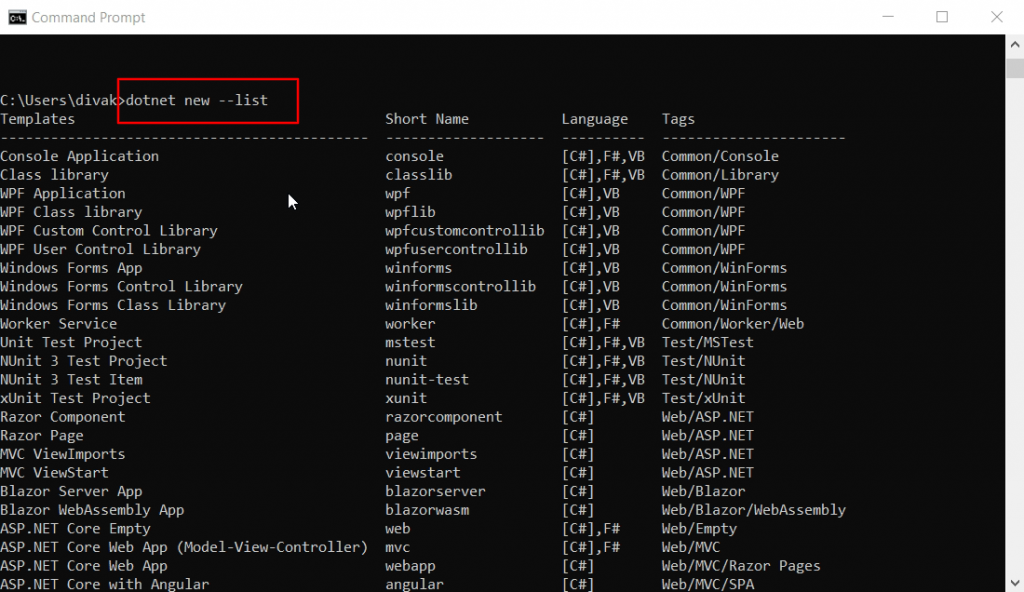
Once you have installed .NET CLI , run below command in your command prompt
|
|
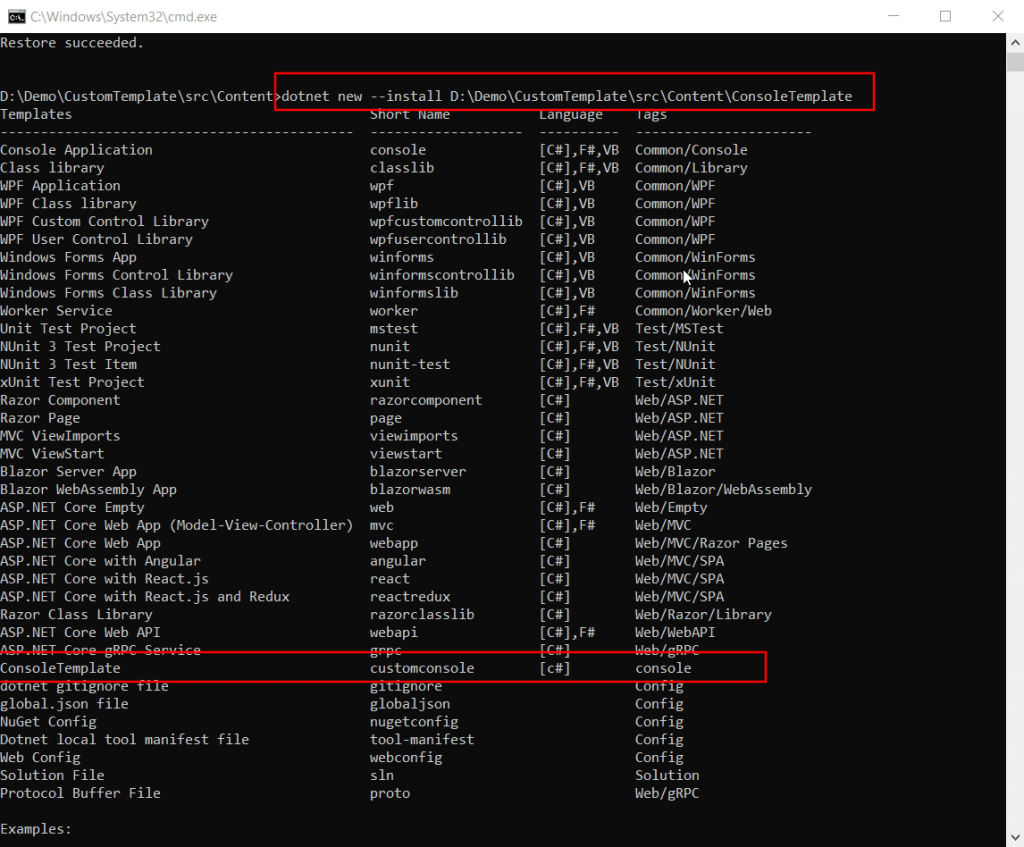
This will gives you the list of built-in templates that are available as part of your .NET SDK
Custom .NET Core project template creation:
Open solution explorer and create folder structure in below format
|
|
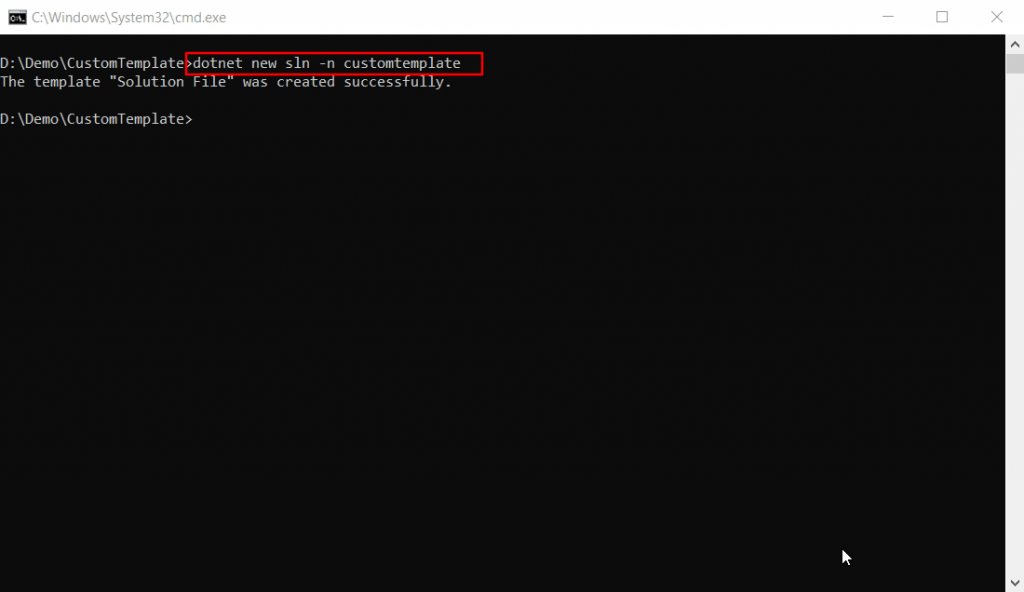
Create empty solution under src folder using below command
|
|
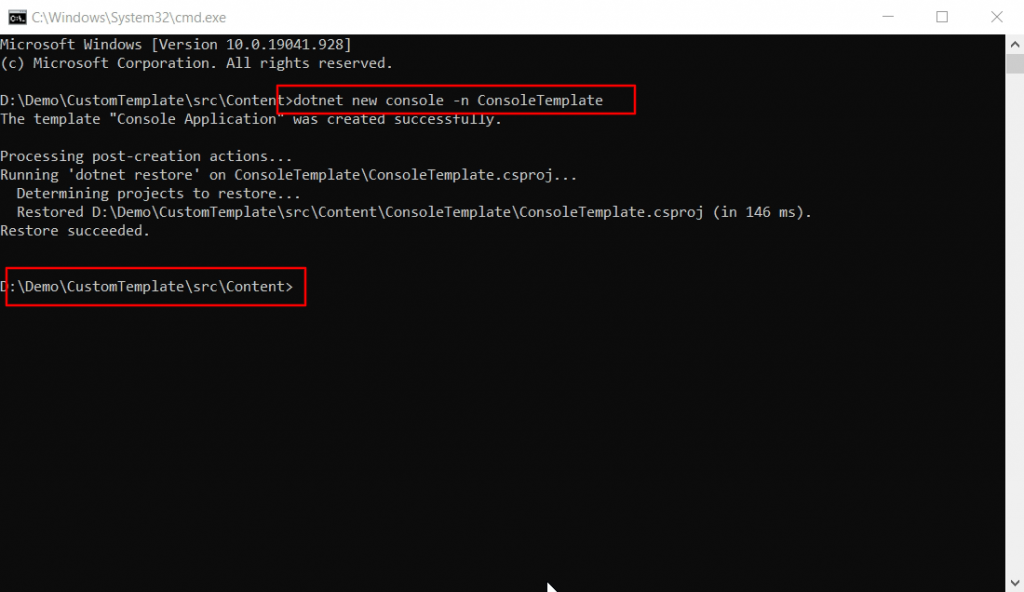
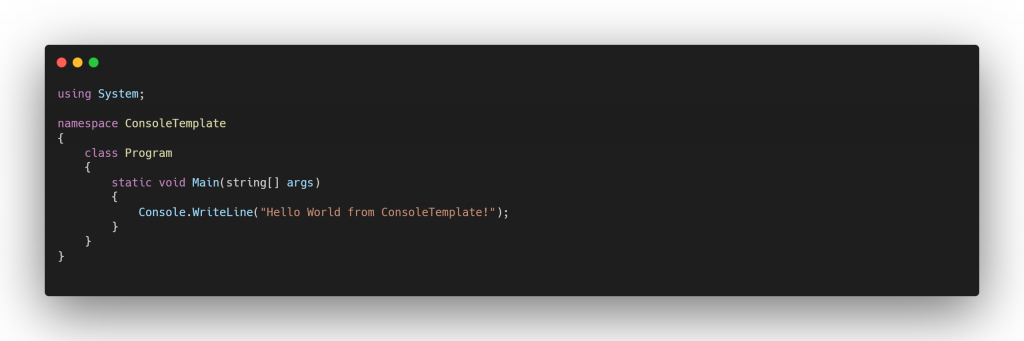
For demo purpose we will create a console application using visual studio and place it under Content folder.
|
|
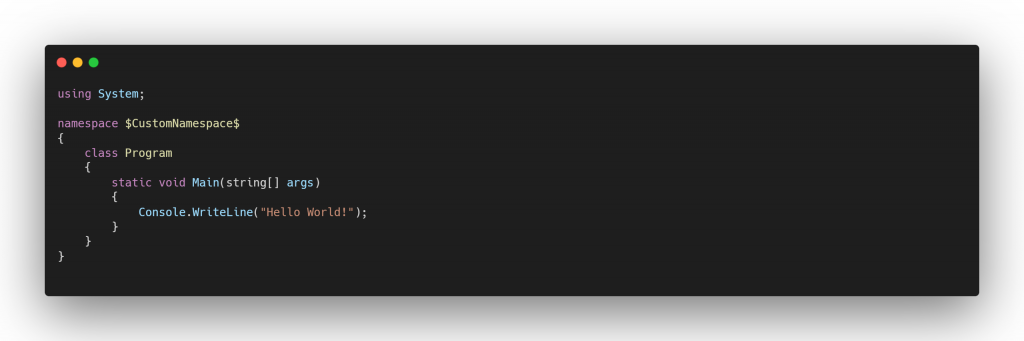
Earlier one should tokenize each namespace of the class file in order to replace it with the name provided by a user at the time of installation. Below is the representation how they used to create a class files with namespace tokenized.
So whenever we are planning to create a custom template we should maintain two solutions and it created lot of issues. With the help of Template Engine we don’t need to tokenize the namespace across all files.
The template engine is a open source that will look for any occurrence of the
sourceNamementioned in the config file and replace it in file names and file contents. The value to be replaced with can be given using the-nor--nameoptions while running a template. If no name is specified, the current directory is used
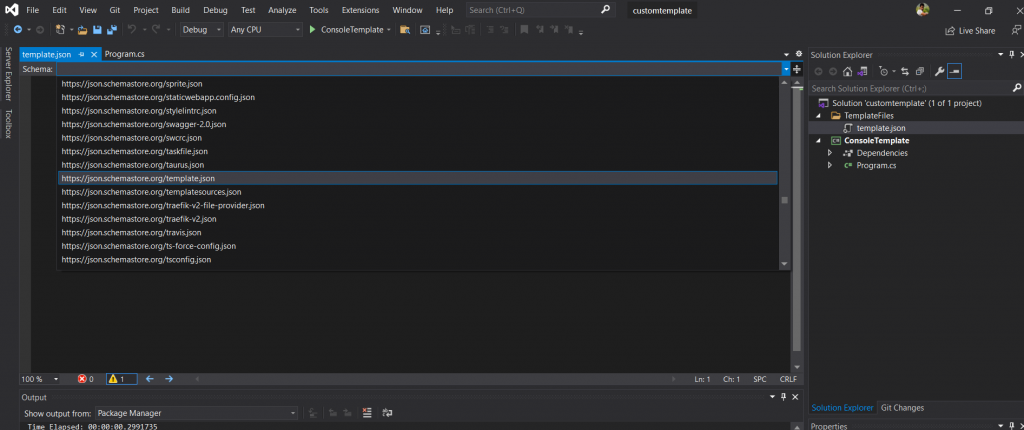
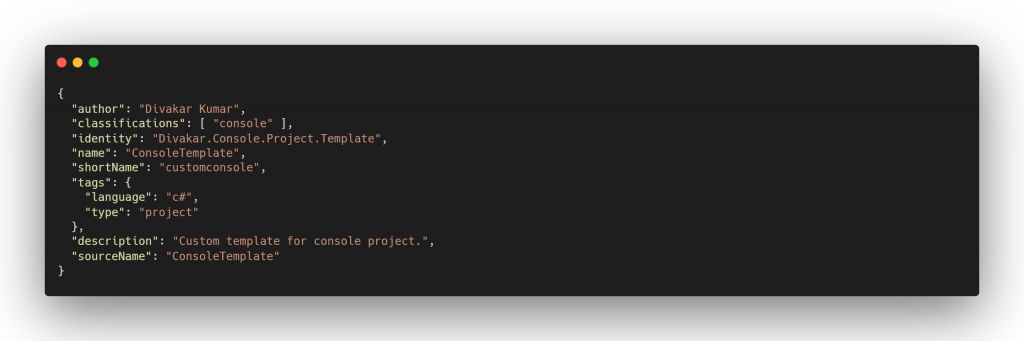
Now let’s create template.json file that defines the configuration information to the template engine. Choose “https://json.schemastore.org/template.json” as your schema
Now let’s install our custom template using the below command . Replace the folder path with your custom path , where you have placed your console project.
|
|
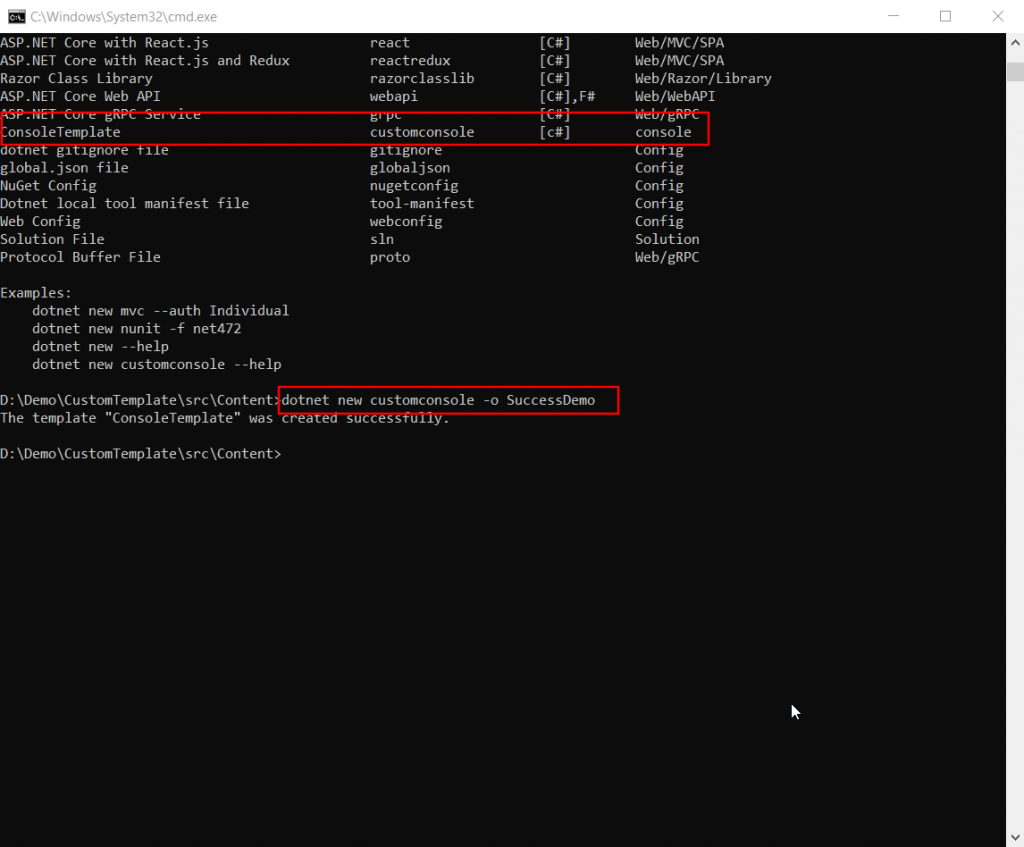
Now that we have installed our custom template , lets create a new console project based on this template and let’s see the output of it. use the below command to create a new project using our template. Replace the shortname “customconsole” with your template’s shortname
|
|
Output
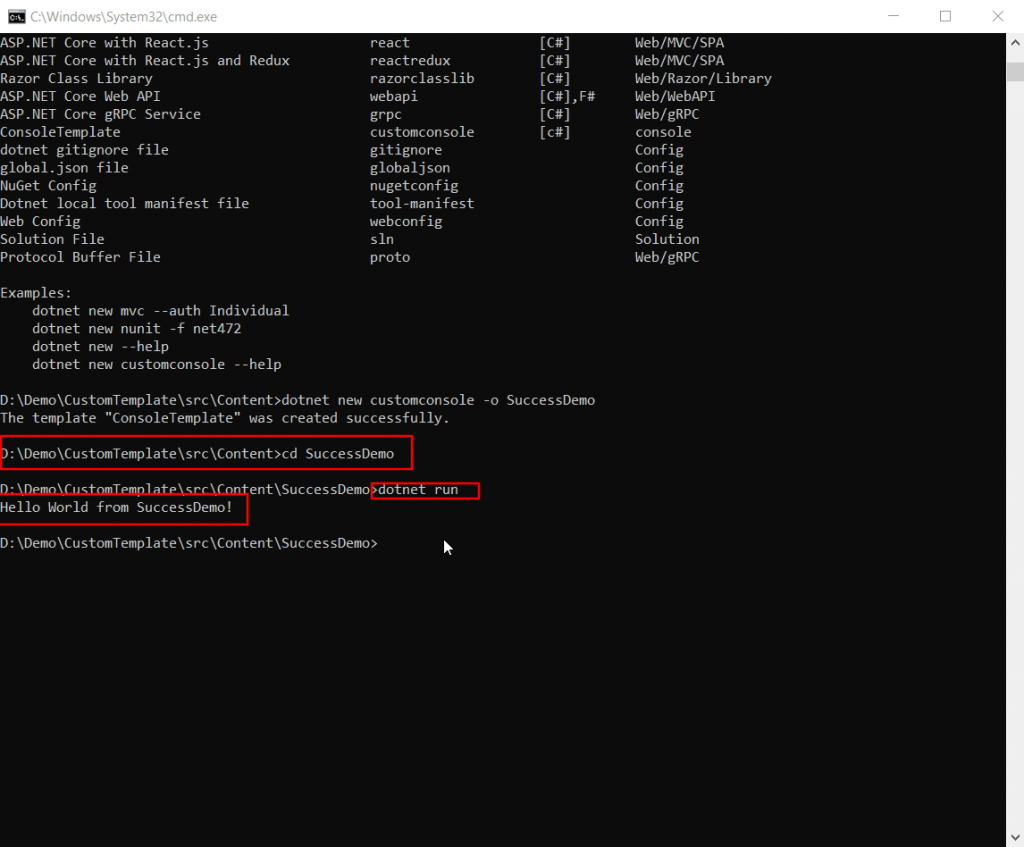
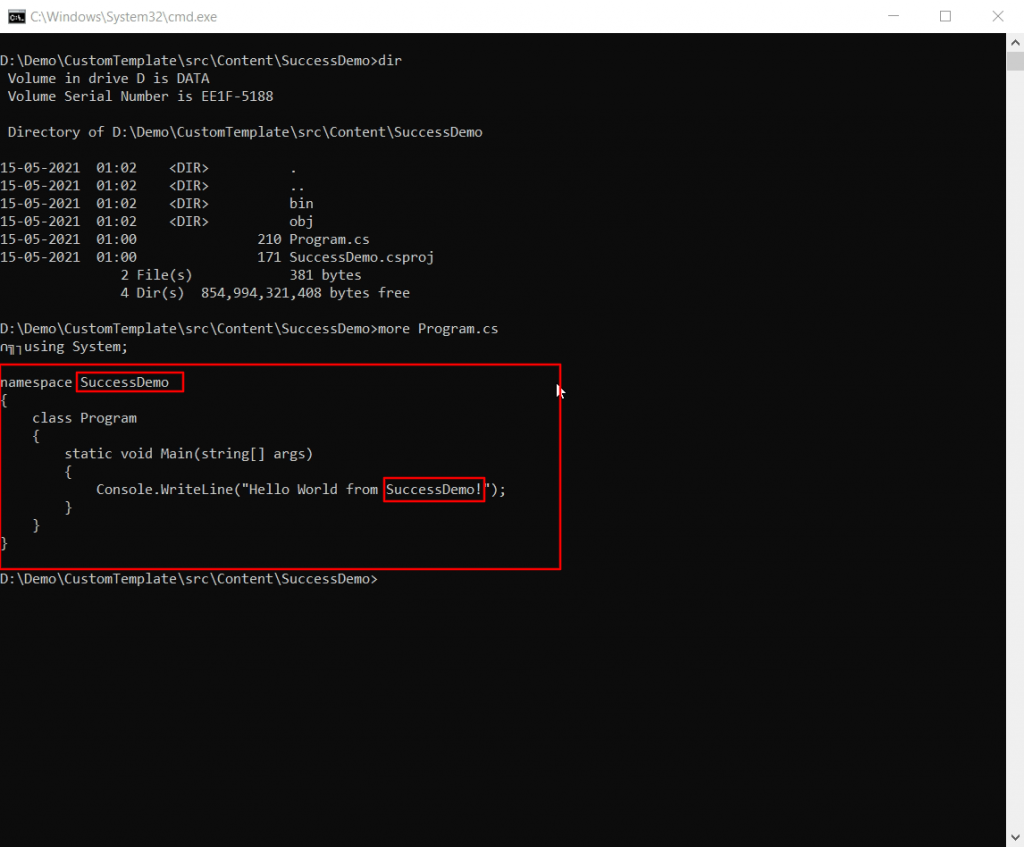
We can see “Hello World from ConsoleTemplate!” has been replace to Hello World from SuccessDemo!
Summary
In this blog we have covered :
- Why we need Custom Template
- .NET CLI overview
- Folder structure for Custom template
- Role of Template Engine
- Content of template.json
In our next blog let’s see how to nugetize this custom template, share it across team and make use of it in a effective way . Find the github repo for this blog here and feel free to leave a comment and fork the source code.
Sponsor
If you find this post helpful, please consider sponsoring.
